Sanitation of Hard to Clean Parts

Plate chillers, pumps, ball valves, air stones and more

The most frustrating aspect of home brewing is when a batch goes bad. The only way to improve your chances of avoiding this depressing situation is to maintain the highest degree of sanitation in your home brewery. No matter how hard you try, or what techniques you use, achieving absolute sterility in a home brewing environment (or for that matter most commercial operations) is impossible. Although some contaminants will always be present in pitched wort, many bacteria cannot survive in the beer — with the rapidly dropping pH and alcohol formation — so trying to limit the amount of contaminants that get into the fermenter as possible is the goal.

Hard to clean homebrew parts

As home brewers, we put a lot of time and effort into cleaning and sanitation. Beginner books and brewing kit instruction sheets are showered with reminders to clean and sanitize every part so that your beer doesn't't get contaminated. Most beginner brewing kits are simple to take apart and clean, not taking up too much of your brew day. This practice of cleaning and sanitizing lays a foundation for the brewer to adhere to as they start to upgrade their system.

After running a few batches through my first plastic bucket setup I started to notice the scratches left behind from my stirring spoon. Fermentation equipment, particularly plastic, which can be somewhat porous and easily scratched can harbor bacteria and be difficult to render sterile. Both siphon hoses and the plastic lines going in and out of your beer kegs suffer from this problem too.

This is where some brewers make the decision to use all stainless steel gear. Fighting bacterial infestations, vinegar cultures and rogue yeasts in your homebrew is a lot easier when you can scrub and clean all of the surfaces until the equipment shines.

Keeping idle equipment submerged in a sanitizer, or ensuring every surface has sufficient contact time with a sanitizing solution before use is critical. Bacteria love to hide in damp and sticky spots in your brewing equipment, so the first line of defense in homebrew sanitation is to take the time to clean all surfaces properly, even those in hard to reach places.

One factor often overlooked when cleaning and sanitizing home brew set-ups is that of the water used. Tap water in modern cities is sometimes good, sometimes terrible. It is wise to do some research and find out how your city water rates when analyzed for bacteria, harmful chemicals, and heavy metals. The quality of water used in making beer has a very strong connection with the quality of the finished product.

Homebrew cleaning and sanitation may be the most tedious and least glamorous part of home brewing, but it is very important. It is nearly as important as drinking the brews! Each home brewer develops different techniques and has different tools in their homebrew cleaning kit, so make sure to network with others to find out more tricks and tips for maintaining proper homebrew sanitation.

Plate Chillers
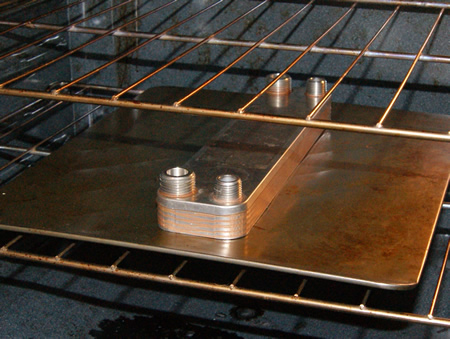
Unless you're careful with filtering, plate chillers can and do clog up with debris. Any debris that's trapped during transfer needs to be back flushed out by connecting the wort inlet to the water supply. I always back flush my plate chiller when done, and then pump hot PBW through it (which I do to clean my pump and hoses anyway, so there's no extra work). Then you can soak it in a sanitizer or bake it in the oven to sterilize (see John Palmer's book How To Brew for info on time vs. temp).

Baking a plate chiller

The baking process (heat sterilization) kills all microorganisms, not just most as in sanitizing. To be sterilized, items need to be heat-proof at specific temperatures. Glass and metal items are prime candidates for heat sterilization.

Pumps Heads
At the end of my brew day I fill the Hot Liquor Tank with hot water and cleanser to pump through the system. My system uses two centrifugal magnetic drive pumps to move water and wort around as needed.

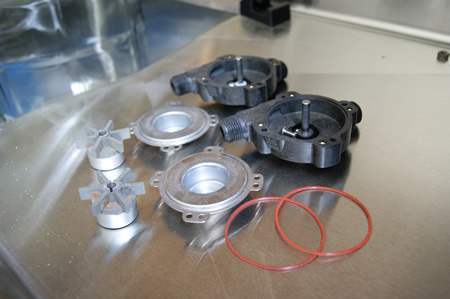
Take apart your pumps and clean all the parts

The final wort transfer is from the kettle to the plate chiller and it passes through the pump. This final push includes some trub and cold break which sometimes get stuck in the pump head. I do use a first level of filtration on the brew kettle, but it doesn't catch everything. The pump head is a great place for bacteria to hide, so I make sure to open the pump heads and thoroughly clean the impeller, o-ring and stainless steel and plastic housings. Watch for scratches on your pump head housing and step up to an all-steel pump head if you have concerns.

Ball Lock Valves
This is another one I wish more people had told me about. I have a few different types of three piece ball lock valves. I clean them with a brush, cleansers and sanitizers and thought this was all I needed to do. Wrong.

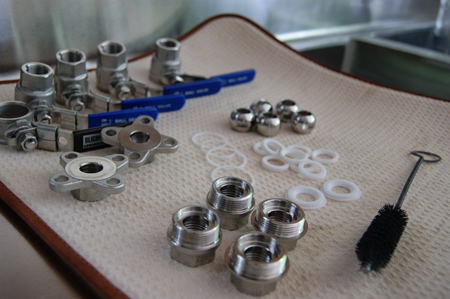
Clean ball lock valves

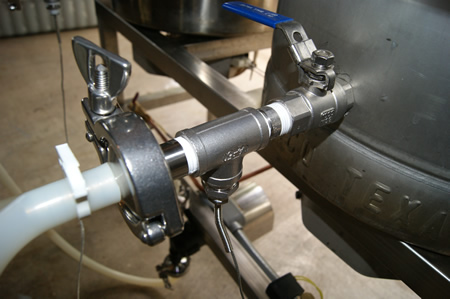
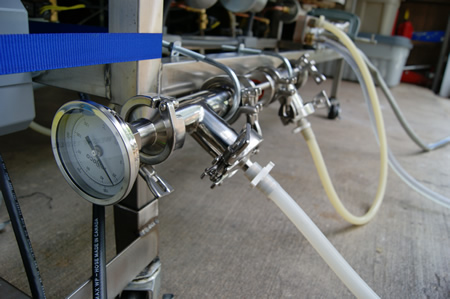
There was still something more to clean. To be very honest, I didn't know you had to unscrew the entire valve for complete cleaning! When I did this for the first time I was horrified. The smell was of rotten feet. To imagine my beautiful brew had been flowing over this foulness made me sick. The three piece valves are hard to crack open and should be disassembled monthly for cleaning to maintain bacteria free valves. I have since moved to tri-clamp ball valves that can quickly be disassembled and have no threads.

Threaded Fittings
I'm a tinkerer. I just can't leave my homebrew system alone and sometimes modifications are only temporary while I test out a new piece of equipment or technique.

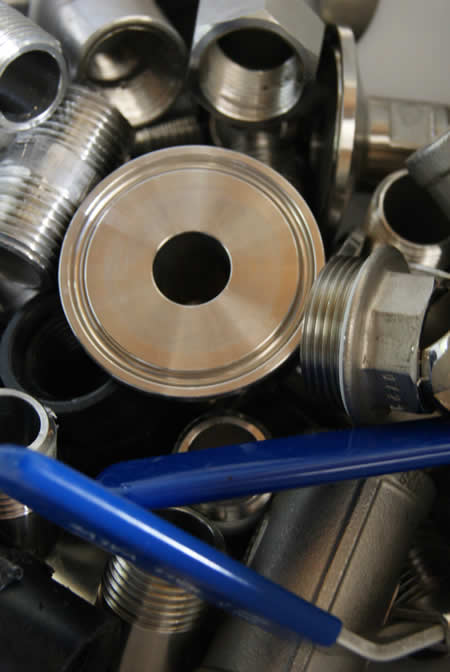
Hard to clean threaded fittings

This means the connections I use are usually threaded connectors until I am committed to the new arrangement and then can convert them to a more seamless style connector. Having threaded connectors works fine, but they get dirty. I make a habit to pull off all the parts, clean and rewrap with Teflon at least once a month if I am brewing steadily. Back flushing with cleaners and sanitizers between these larger cleanouts will limit bacterial growth.

Air Stones
I use an inline air stone within my oxygenation assembly. These stones get clogged from time to time. You have to be careful handling air stones too... finger grease can gum them up, so imagine what wort can do.

Inline air stone

Whether you use your stone in an inline aeration, keg lid mount or on a tube/cane you need to boil the stone to keep the porous surface free of debris. Boil in distilled water for 15 mins (preferably in a pressure cooker). Second best is to bake the stone in the oven @ 338F for 1 hour. A third option is to soak the stone in Star San or hot PBW.

Christian Lavender Christian Lavender is a home brewer in Austin, TX and founder of Kegerators.com and HomeBrewing.com.

Related Articles:
Sanitation in the Homebrewery - An interview with Ken Grossman of Sierra Nevada and Vinnie Cilurzo of Russian River Brewing on the importance of sanitation in the home brewery.
Homebrewing with a Closed Transfer System - Learn how to minimize oxygen and contaminant exposure in your homebrew..
Know Your Off Flavors and What Causes Them - Keep your brewing gear clean to prevent off flavors.